Everyone loves to watch YouTube and we know that everyone loves to spend hours watching their favourite YouTubers like Zoella or PewDiePie. But not many people realise how much data YouTube can sometimes consume. It can get especially high if you’re watching a lot of HD content or even 4k content if you have a 4k device.
If you notice that your data usage is getting close to your plan’s cap, then these strategies below will help you out, especially if you still want to keep watching your favourite YouTubers.
Saving YouTube Data On Mobile
If you often leave home and are away from your home’s Wi-Fi connection and like to watch YouTube on your phone, you will find that a lot of your phone’s data will run out very quickly. These steps will help you with saving YouTube data on your mobile device so you don’t exceed your data allowance.
Photo’s were taken on an Android mobile device
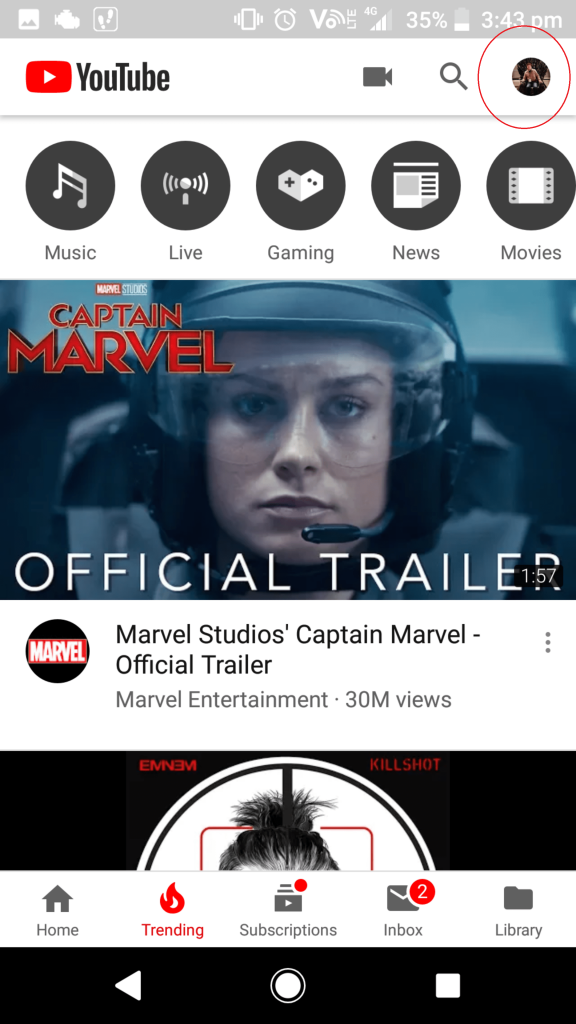
Step 1: Open your YouTube app. Then take a look towards the top corner near where your profile picture is and click there.
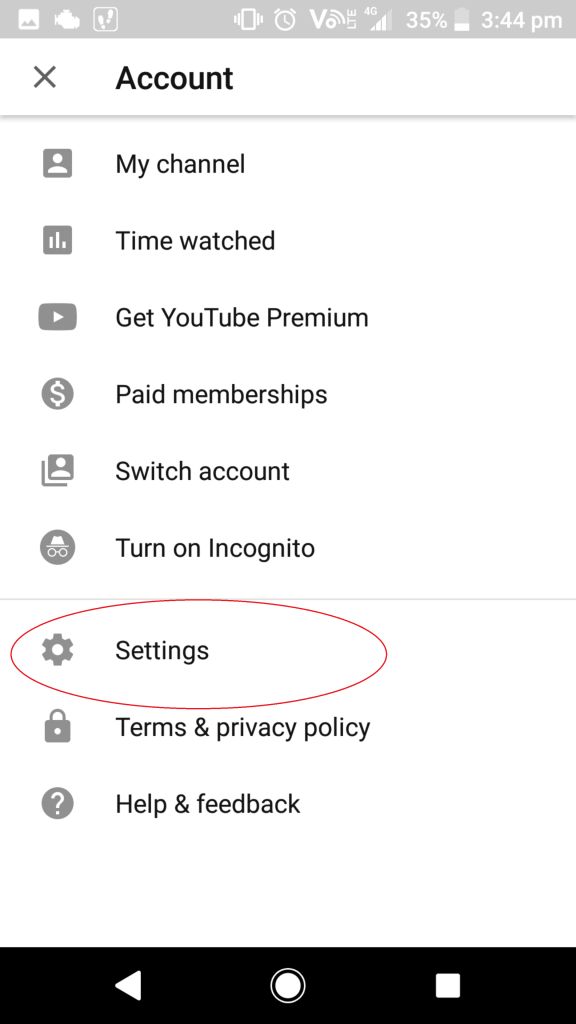
Step 2: Look towards the bottom of the “Account” page and click on “Settings”
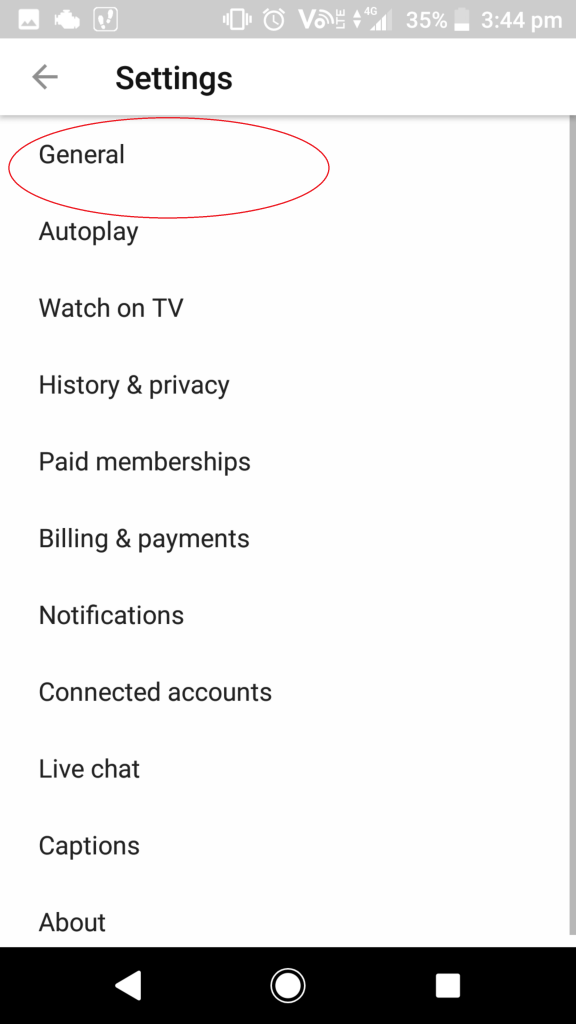
Step 3: Now click on the option in the “Settings” page that says “General”.
Step 4: In the “General” page is what you are looking for, tap on the option titled “Limit mobile data usage”.
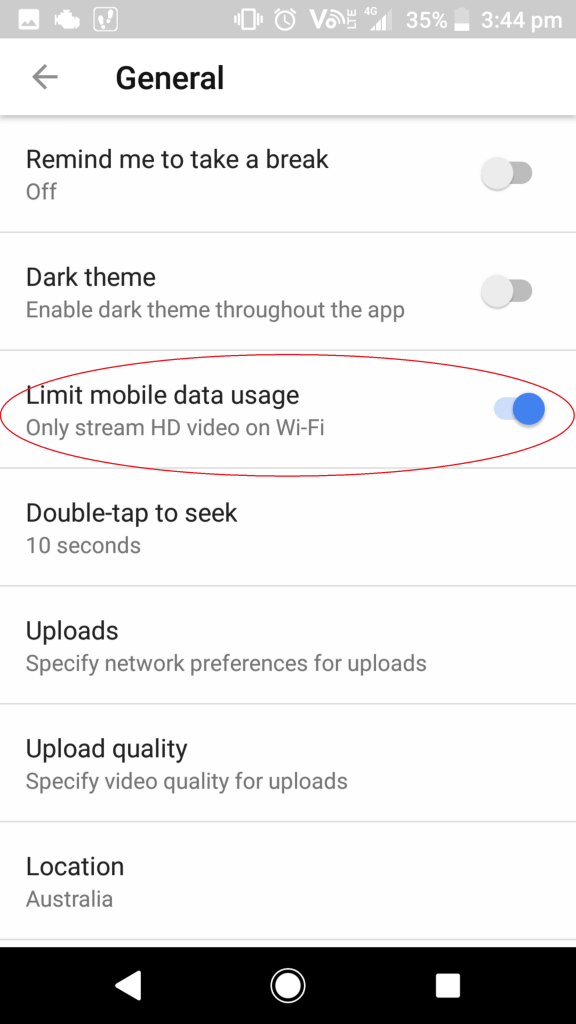
After this your YouTube app will only stream HD video on Wi-Fi only.
Saving YouTube Data On PC
It’s very easy when at home and you are watching your favourite Youtubers to spend hours catching up with all the weekly videos.
Generally YouTube will try to stream its videos at the highest quality for internet speed, which is great for quality, but not for your data at times. If you want to focus on saving YouTube data on your PC here’s what you could do.
Step 1: Login to your YouTube Account
Step 2: Click on a video you would like to watch. Pause the video and take a look at the gear icon towards the bottom right of the video. Then click on that icon.

Step 3: After clicking on the gear icon a small menu will appear which shows you a few different video options. Next you will want to click on the heading labelled “Quality”.
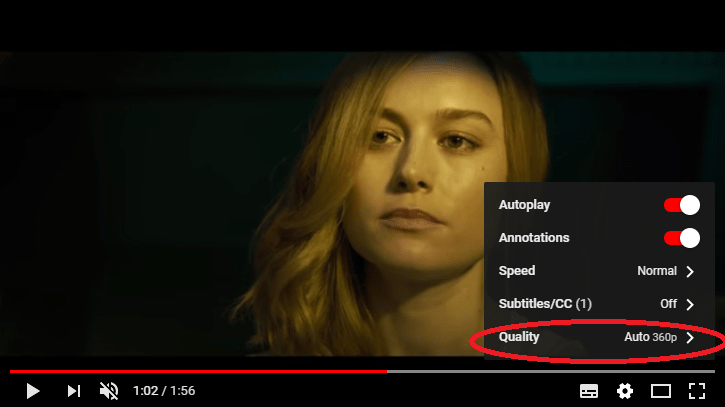
Step 4: You will now see a range of video quality options. Ideally if you want to save a lot of data you might want to consider one of the 480p or lower choices as the HD options will use a lot more data. But if you usually stream in 1080p and want to save some data, but still want good quality, then choosing 720p might be all you need to do. Your choice of video quality simply depends on how much data you have left and how much you want to use.

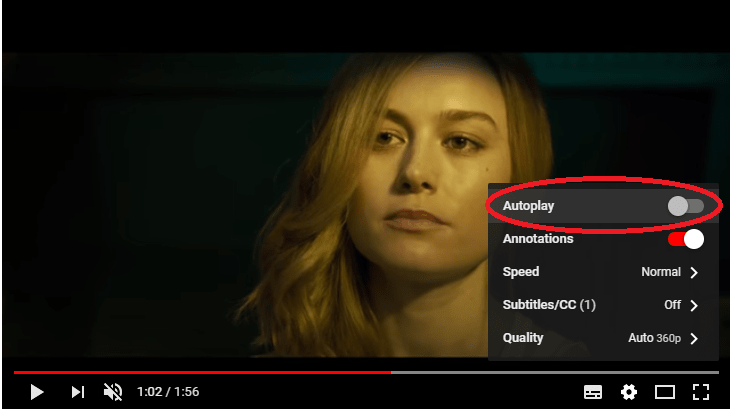
Step 5 (Optional): Using the same gear icon you clicked on in the previous steps to change you video quality. If you click it again you will see an option entitled “Autoplay”. When the “Autoplay” option is on, this will mean that when you finish watching a video on YouTube, YouTube will then automatically play the next video in a queue.
If you leave the room often and often leave YouTube running, it’s possible for it to keep playing for quite a long time. If the next video is a long one and if your video settings are set to 1080p then you might use a lot of data, even when you’re not even in the room at all!
To help stop this from happening you can check the “Autoplay” feature off and it won’t do that anymore on your PC.