Twitch is one of the most popular streaming services on the internet right now. If you’ve got a lot of gamers in your household or young kids, you can certainly guess that they’re either watching Twitch.tv already or they know about it. Twitch.tv is a streaming service where anyone can livestream their own video game content on the site for Twitch viewers to enjoy by uploading gaming content to the site.
For the most part though, most people are viewers of Twitch streamers and follow their favourite streamers daily. But many don’t know how to track or monitor Twitch data on their plans. It can use quite a lot, especially if someone in your home decided to tune into a single six hour stream, which isn’t uncommon on the site. But how can you do something about reducing Twitch data?
Steps for reducing Twitch data in your home
For the most part, what you will want to look at when reducing Twitch data in your home is to look at the video quality settings of the videos you are trying to watch. Moving the video quality options around will help you save quite a bit of data on your plan.
All images in this guide were taken on a PC using Google Chrome
Step 1: Visit Twitch.tv and find a streamer you would like to watch. Click on their video.
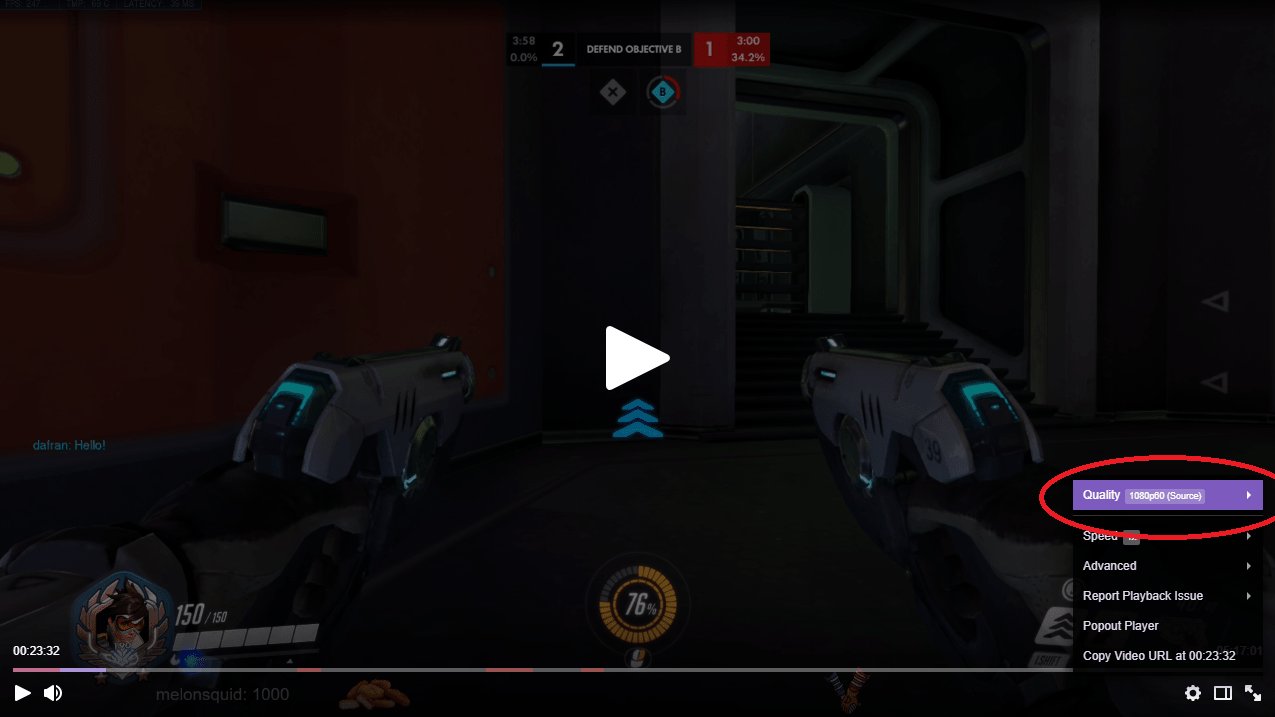
Step 2: Look towards the bottom right of the video. You will see a gear icon. Click on that to open the settings of the video.

Step 3: With the settings now open, click on the menu item labelled “Quality”.
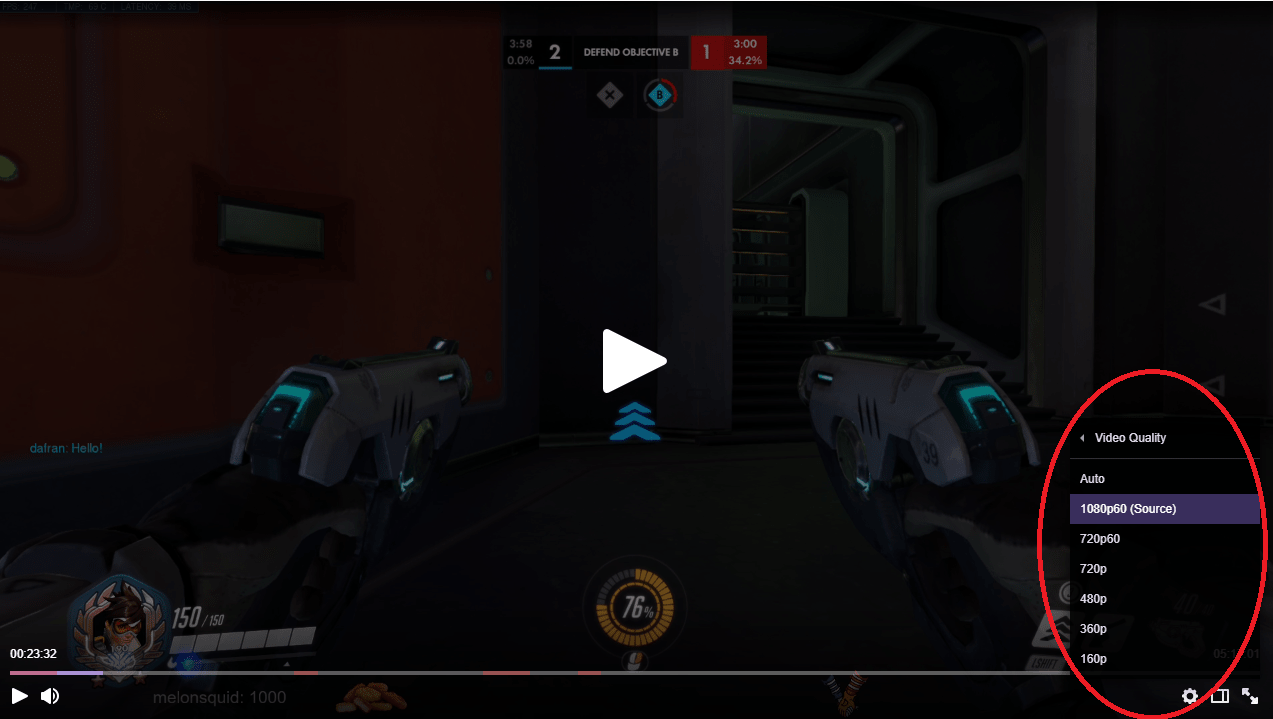
Step 4: Once you’re in the “Quality” section, you will now see a list of different video quality options for each stream. If you’re looking for a lower data setting, choose one of the lower video quality options.
But how do I know how much data each video quality setting is using?
Taking a look at how much data exactly each stream is using is actually not much more difficult than changing the video quality. 60fps video options for both 1080p and 720p use quite a bit more data than the next lowest option of 720p. If you want to lower your Twitch data a little, but still want good watchable quality on bigger screens, it’s recommended to choose the 720p (not the 720p 60) option.
Here’s how you know how much data each quality setting is using
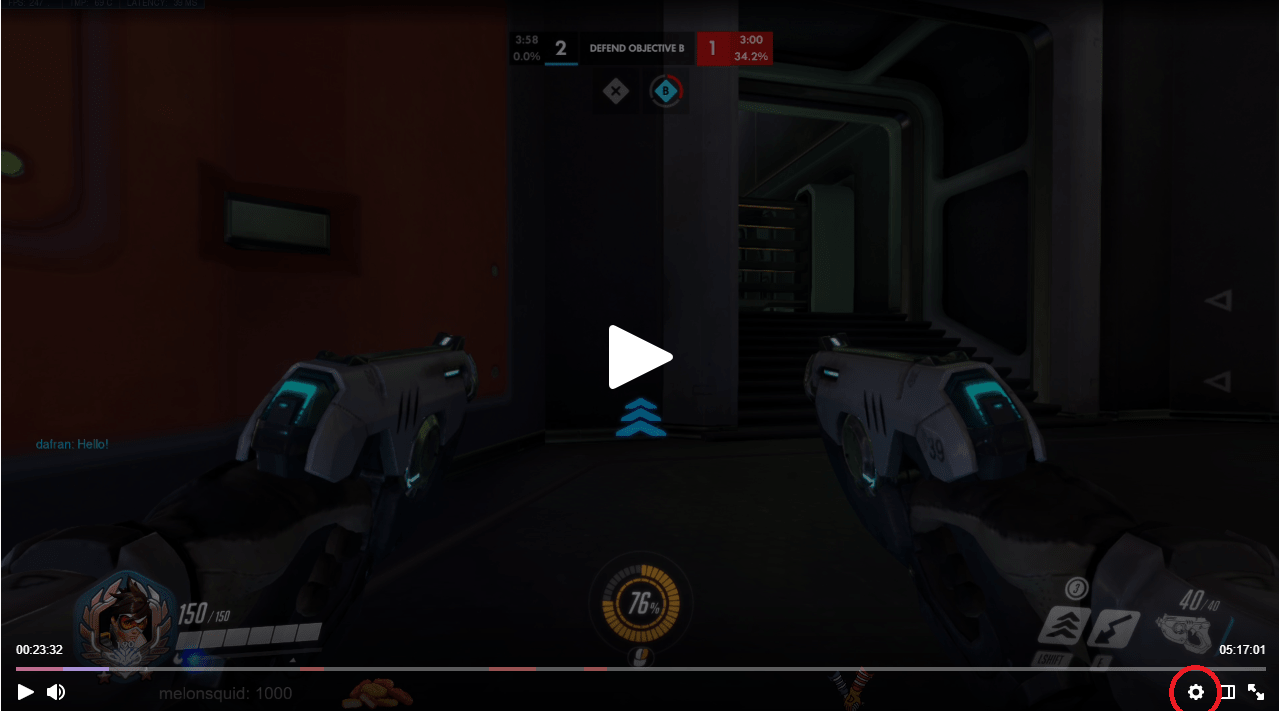
Step 1: Visit Twitch.tv and find a streamer you would like to watch. Click on their video.
Step 2: Look towards the bottom right of the video. You will see a gear icon. Click on that to open the settings of the video.
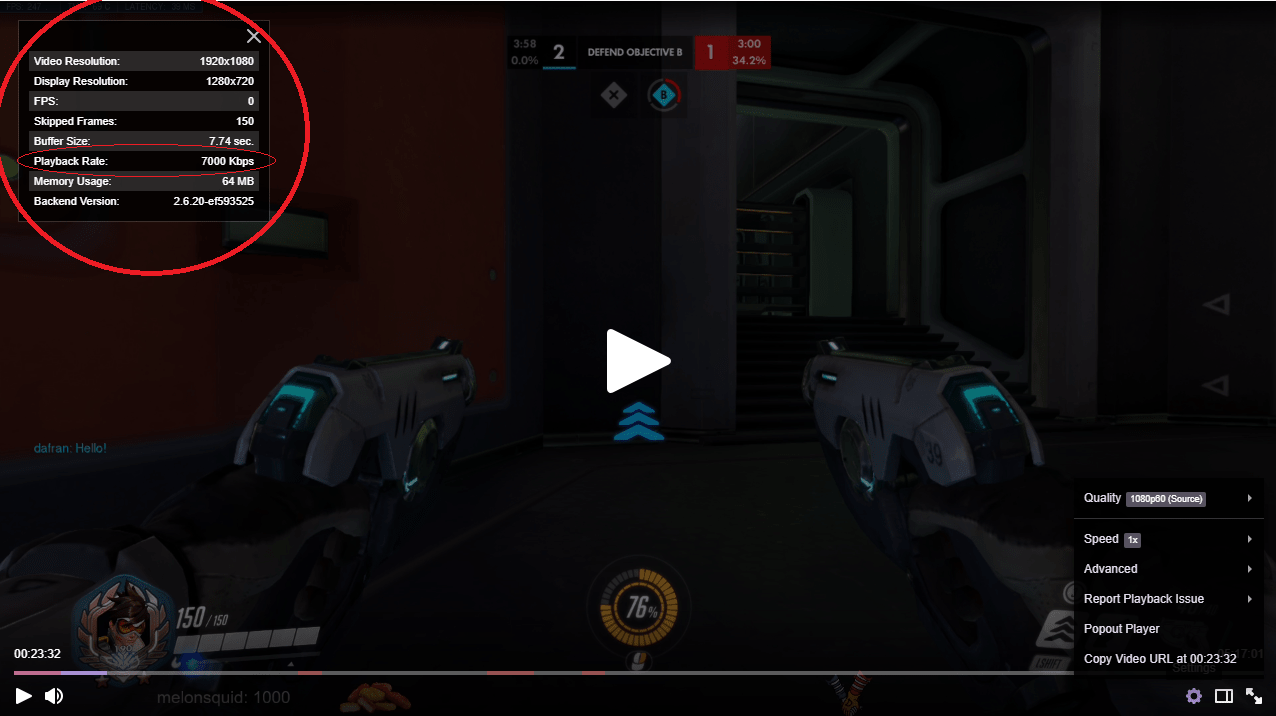
Step 3: Click on the menu item that says “Advanced”
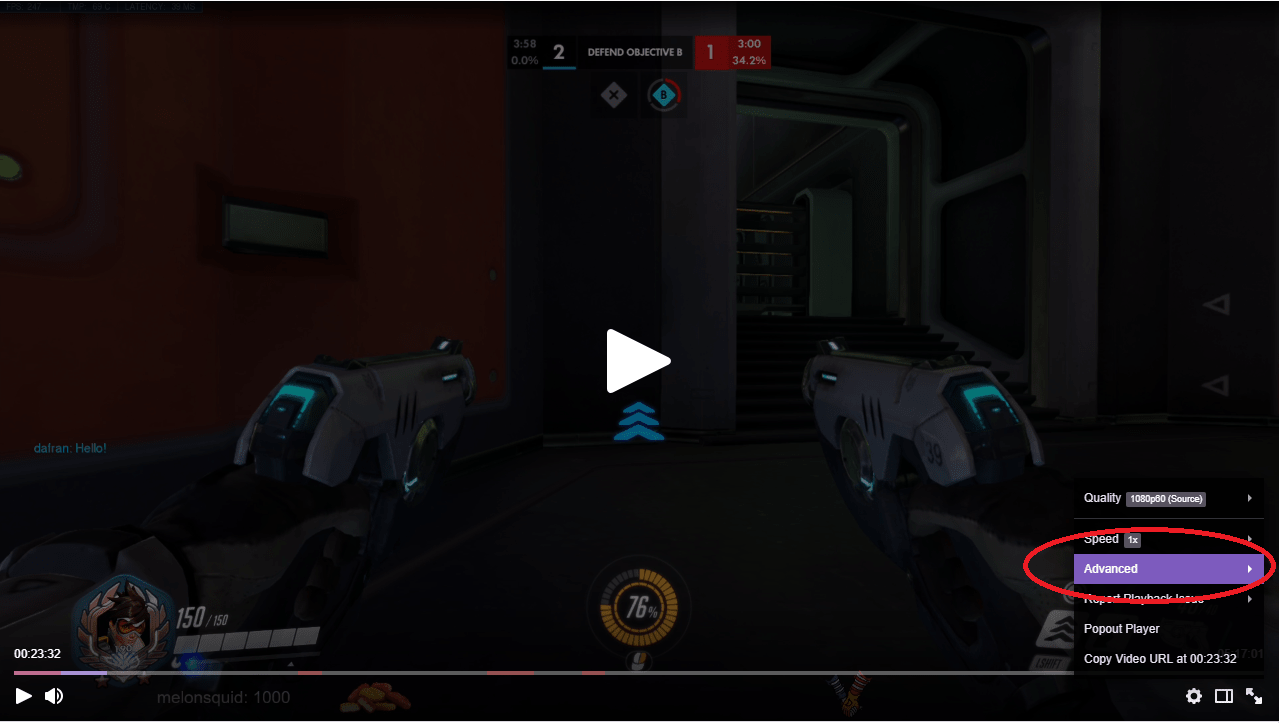
Step 4: Now that you are in the advanced menu, click the option that reads “Show Video Stats”.
Step 5: Once you have opened the video stats, a small window will appear to the top left of your video with different pieces of information about what is happening. In this area, you can see how much data the stream you are currently watching is using.
In the below example you can see that at 1080p and 60fps, the stream was using 7000kbps which is high data usage.
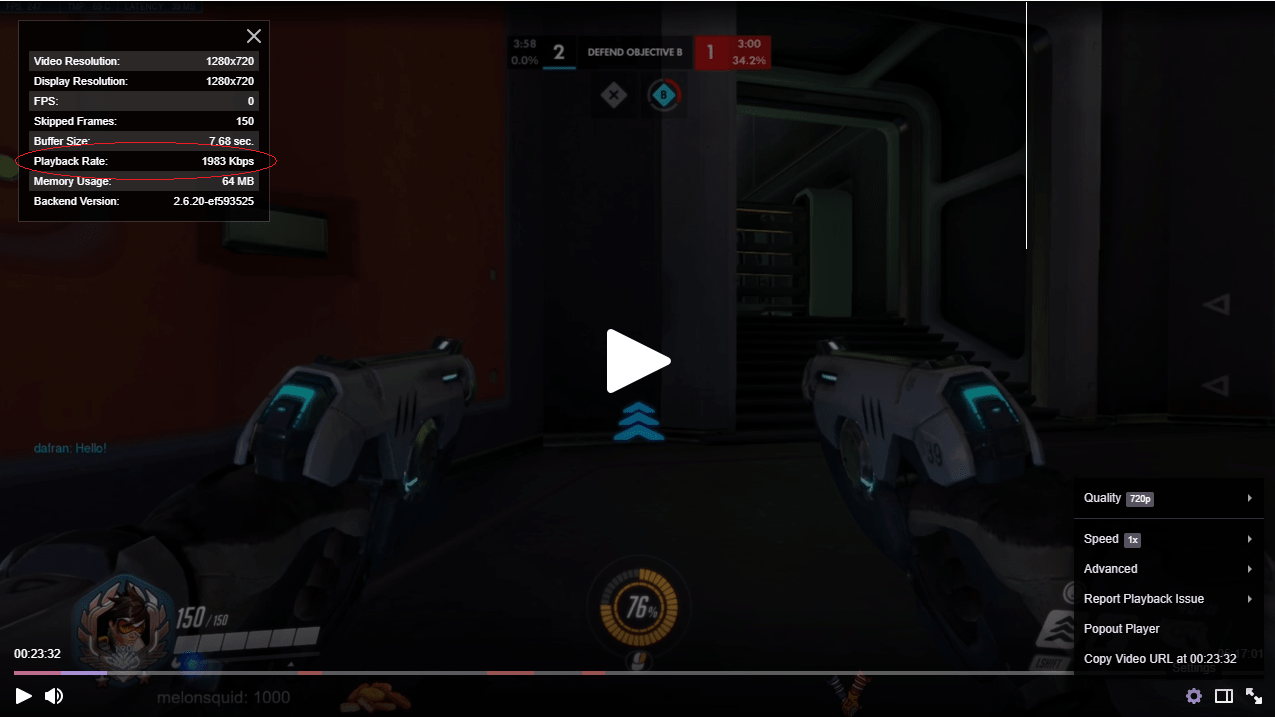
When compared to the lower quality video option of 720p. You can see in the image below that actually it is much less when it comes to data for the 720p option. At this video quality you can see that data consumed is only 1983kbps, much less than the top level 1080p 60fps option and a big saving on your plan’s data!
It’s a good idea to play with the video quality settings and choose the one that’s right for you at home and use the video stats feature to check how much data you are using in different streams.
Contact Reachnet here or call us on 1300 477 800 if you would like to ask us what plan would be the best for you to watch Twitch.tv in your home. We can help you find the right plan for your needs.